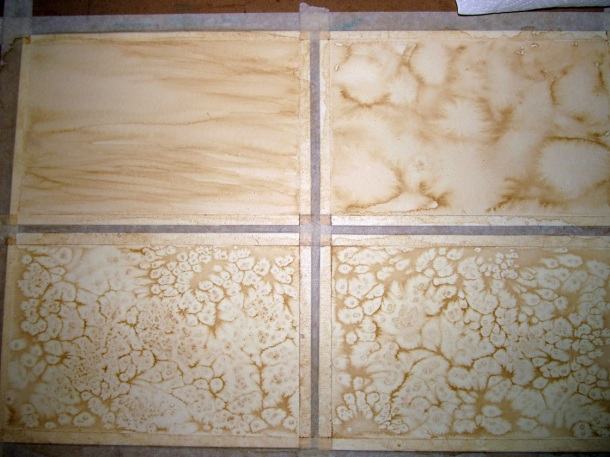
In an effort to step away from recipe blogging for a hot minute, I thought I’d share a painting technique I really enjoy. Obviously my influences come from my career as a tattoo artist and my background in watercolors, but I think this is something that can be easily mastered and used to enhance a lot of differently styled projects. Also, it makes your artwork smell kinda yummy.
I decided, not so long ago, that it was high time that I get myself a professional website with which to promote my artwork (although, to date, it’s not up yet so you’ll have to sate your eyeballs’ cravings for artwork on my Facebook Fan Page or my Deviant Art Page). Since Adam has built webpages for a living in the past, I put him on the job. We decided on a domain name, got it registered with a host and now it’s on to the tougher parts! I decided that I’d like to paint the background textures to be used for my site. Since the focus is going to be photographs of my artwork and tattoos, I want to avoid excessive colors that might mute the brightness of the images. One of my favorite ways to introduce monochromatic texture into a watercolor painting (which tends to be my painting medium of choice for the moment) is by using something called a coffee wash.
Many artists (especially tattoo artists who paint flash) use the coffee wash technique to tone the painting, or to make a piece look aged or antique. Some use tea, some coffee, there are even artists who paint using only these as their pigments. It’s a fun and easy way to add texture to a design without taking away from the focus, and can make painting of a tattoo design look more like it would on the skin, since skin isn’t paper white, but tinted to varying degrees. Using coffee wash can yield a great variety of textures and can provide an excellent vehicle for creative unblocking and abstract play.
Coffee wash is often seen in the artwork generated by the tattoo community, such as seen in the work of Angelique Houtkamp for example. (She’s totally one of my favorite artists lately, I just love her style)
So where to get started? I like to work on watercolor paper, though some prefer Bristol board. The bottom line is that it’s all personal preference and experimentation is your BFF. As you can see in the photo, for this exercise, I taped four squares cut from one larger sheet with masking tape to separate my effects but allow me to work fairly closely together. (Once again, you can see that clearly I don’t do anything halfway…or with much patience for drying time, though I’m working on that)
As you can see from this picture, I like to keep a variety of sizes and shapes of paintbrushes on hand, as well as a clear-water rinse for my brushes. In the center, you can see a cup of coffee that was leftover in the coffeepot this morning. Some people have ideas about instant coffee or brewing the coffee extra strong to make darker tints. I’ve generally just used coffee that sat on the burner all morning, but just like any other watercolor, you can layer to make it darker as needed once the initial wash dries. The one thing I do need to mention is that the washes ALWAYS dry darker than they look! Sometimes it looks like nothing is happening at all, you walk away for 10 minutes and BOOM, suddenly there’s this crazy cool looking stuff going on all over the paper you were about to give up as a “redo”.
Now there are a variety to effects that can be created by simply wetting the surface evenly with the coffee and then allowing it to settle or dry unevenly by periodically adding drops, drips, splatters or streaks as the initial wash slowly dries, as seen in this close-up.
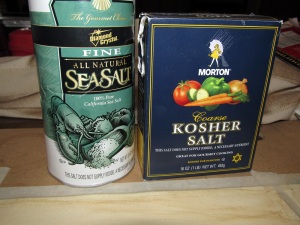
Another approach involves adding things to the drying process. After flooding the paper with coffee and allowing either an even amount of settling, or by adding wetter strokes/areas, sprinkle salt over the area and allow to dry flat.
Try both coarse and fine grain salt, as well as varying the concentration of your sprinkles, you’ll be amazed by how varied they can each be when you play with them a little!
The salt grains melt and push the stain into feathery lines as it dries. Once it’s completely dry, you can remove the excess salt (gently) with a soft gum eraser. There are any number of other wonderful techniques described in detail here that can be applied to coffee wash experimentation, so give it a try! I’d love to see what you came up with!


